This article will cover using Companion by Bitfocus to control multiple channels of PVS. The setup should be similar for any switcher or device capable of sending AMP commands.
To get started, open PVS Preferences and click on Communications. Click on the Add Device menu and select AMP from the list. There is no need to limit the file name to only sending 8 characters with Companion.
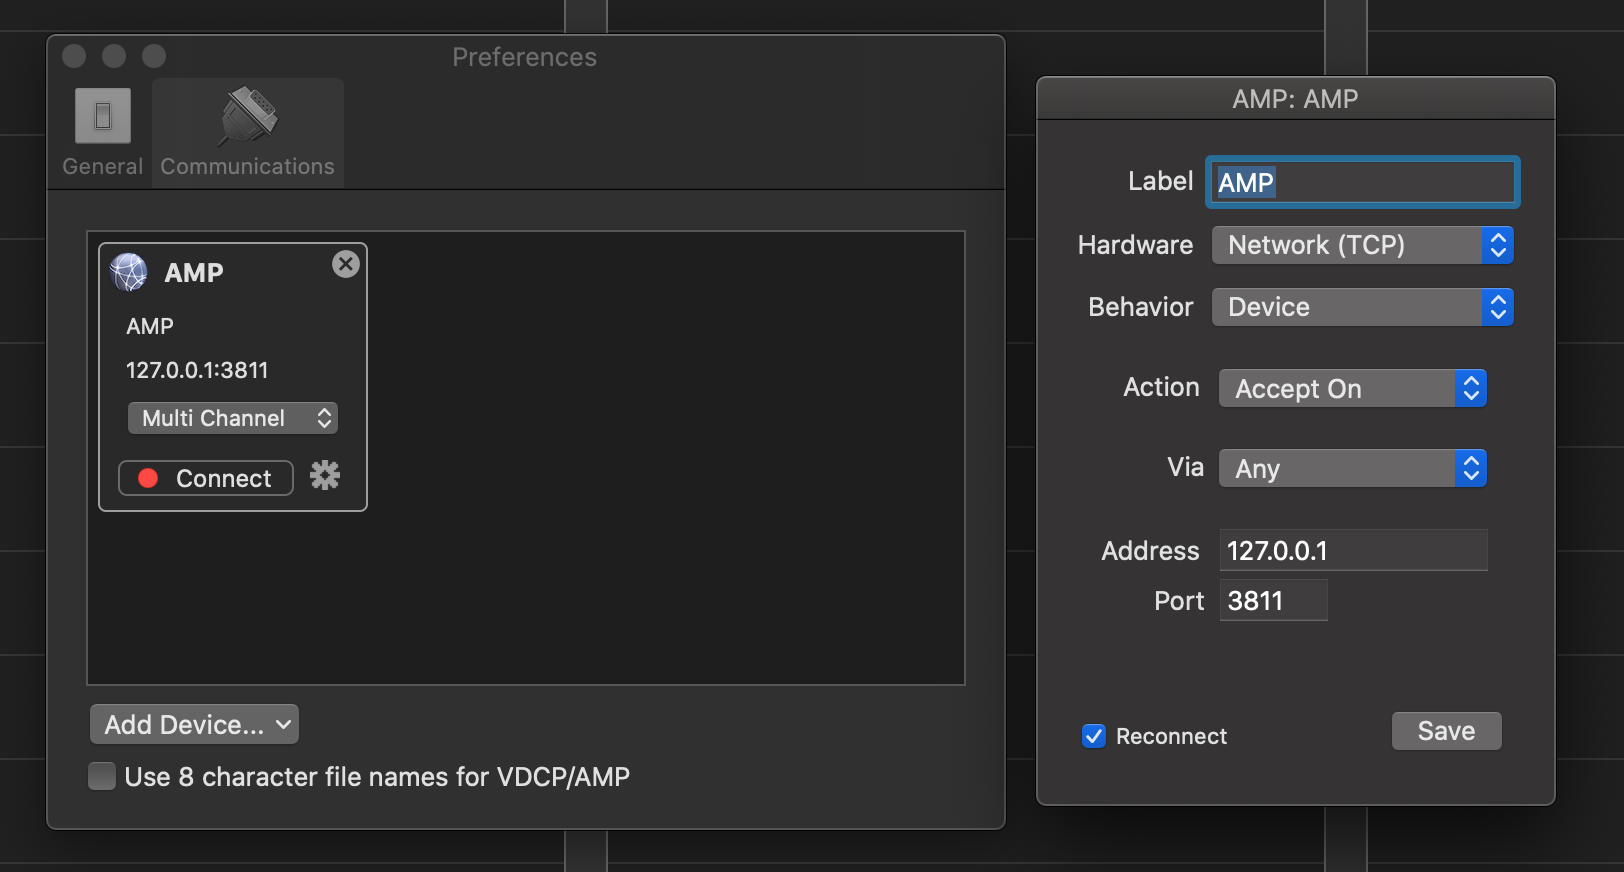
Click on the gear icon to open the settings for AMP. Enter the IP Address of the computer. This will be the same address you enter in Companion. The port can be left at 3811. Leave the channel setting on Multi Channel.
Click on Save and then click Connect.
This has been tested to work as of Companion 2.1.1. Older versions of Companion may not work or have the same support. We will not be covering how to use Companion in extensive detail. Some steps will be skipped over with the assumption that you are already familiar with how to use Companion. If you need help with Companion itself, please use the Companion facebook group or Slack channel.
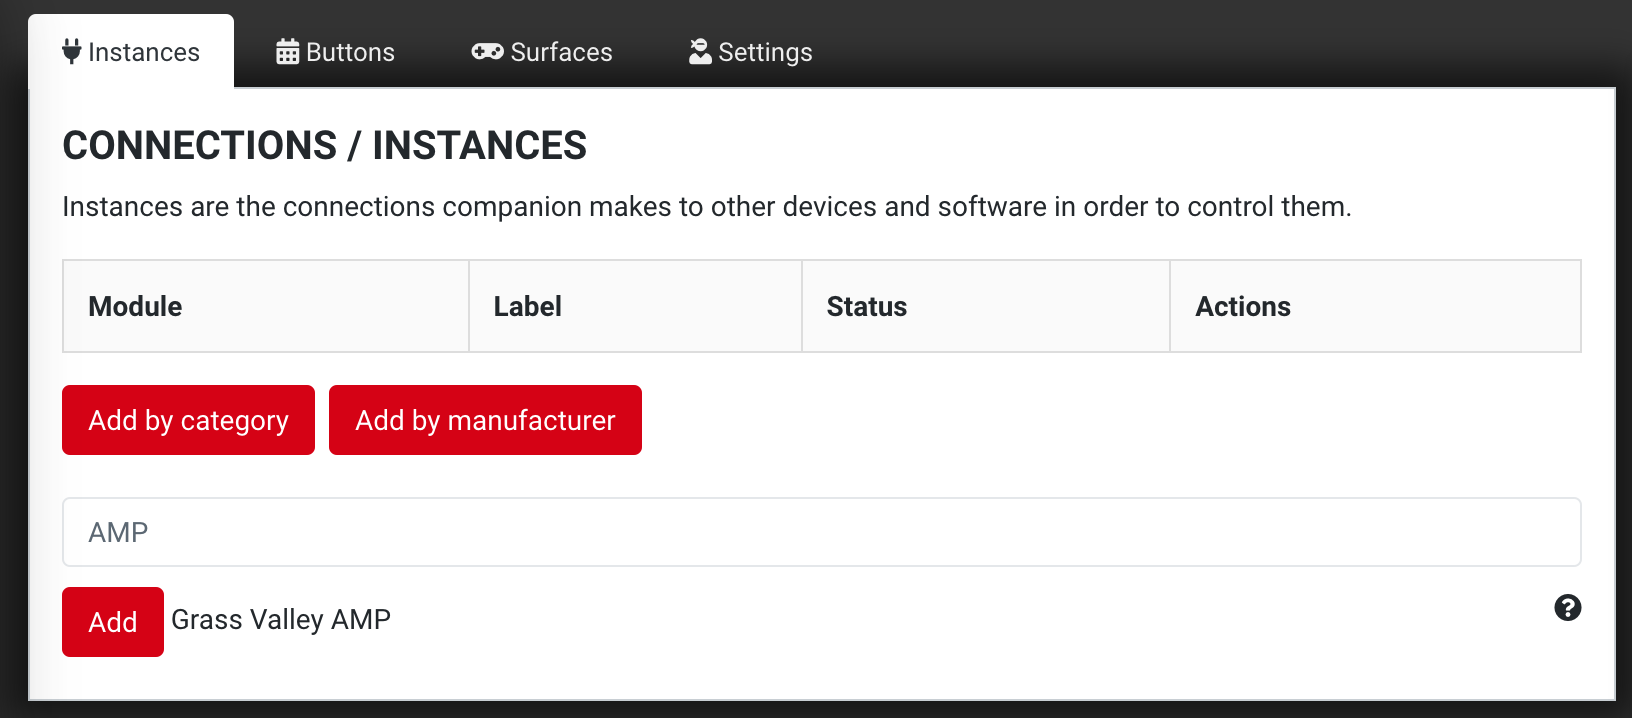
Open Companion and search for AMP. Grass Valley AMP should appear in the list of results. Click the Add button. If you need to control multiple channels, repeat this for the number of PVS channels you want to control.
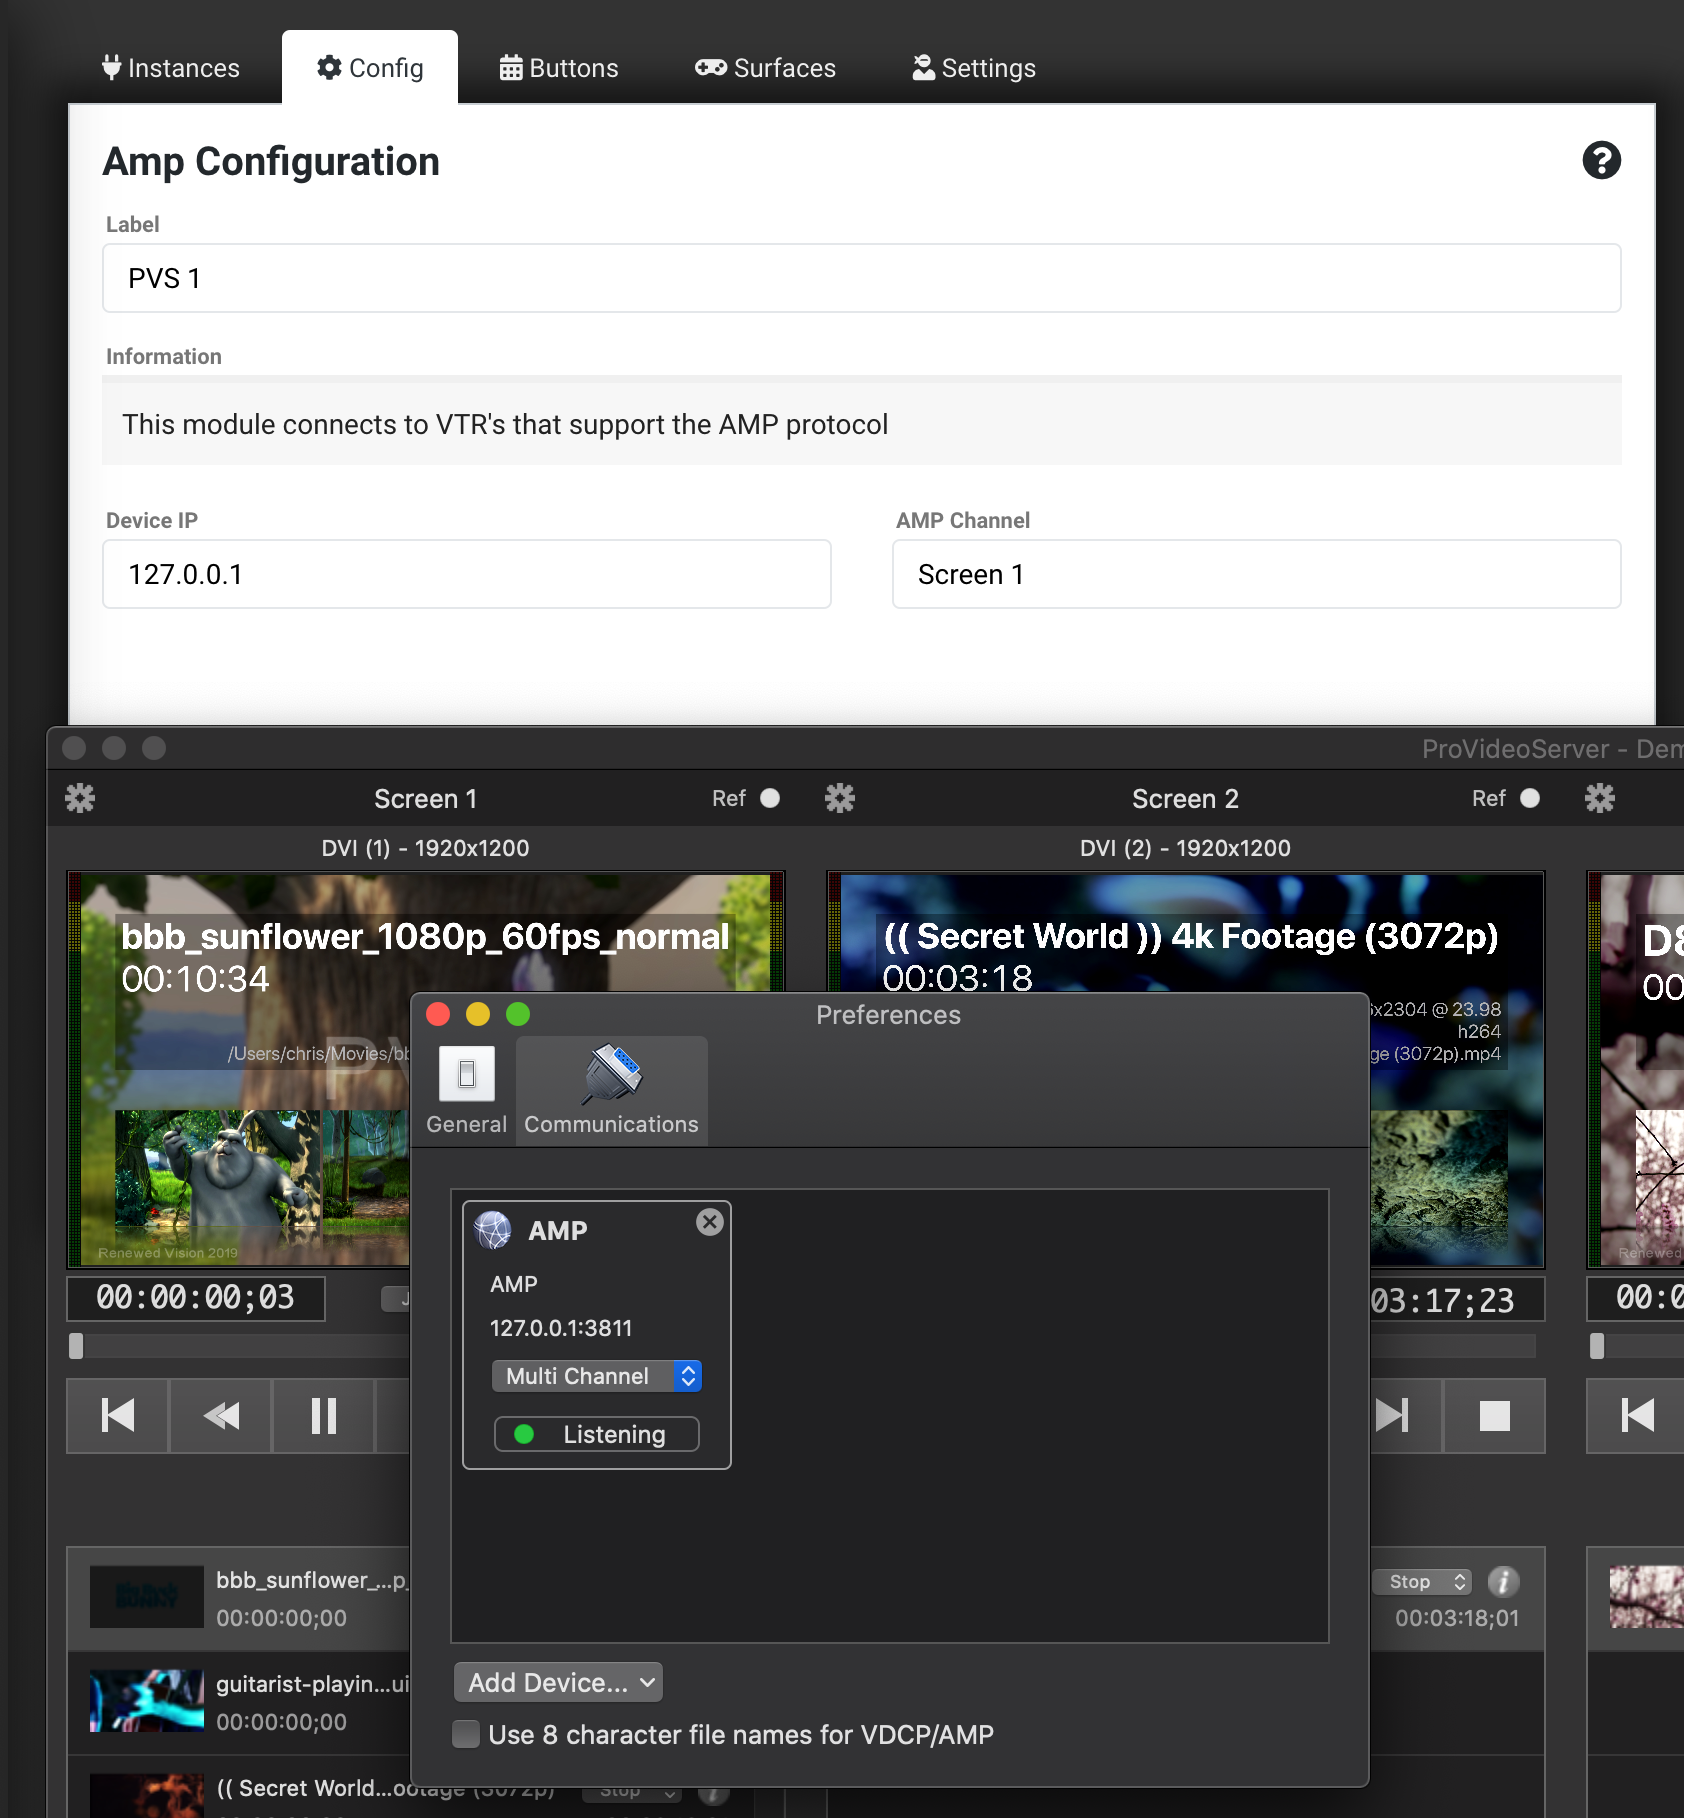
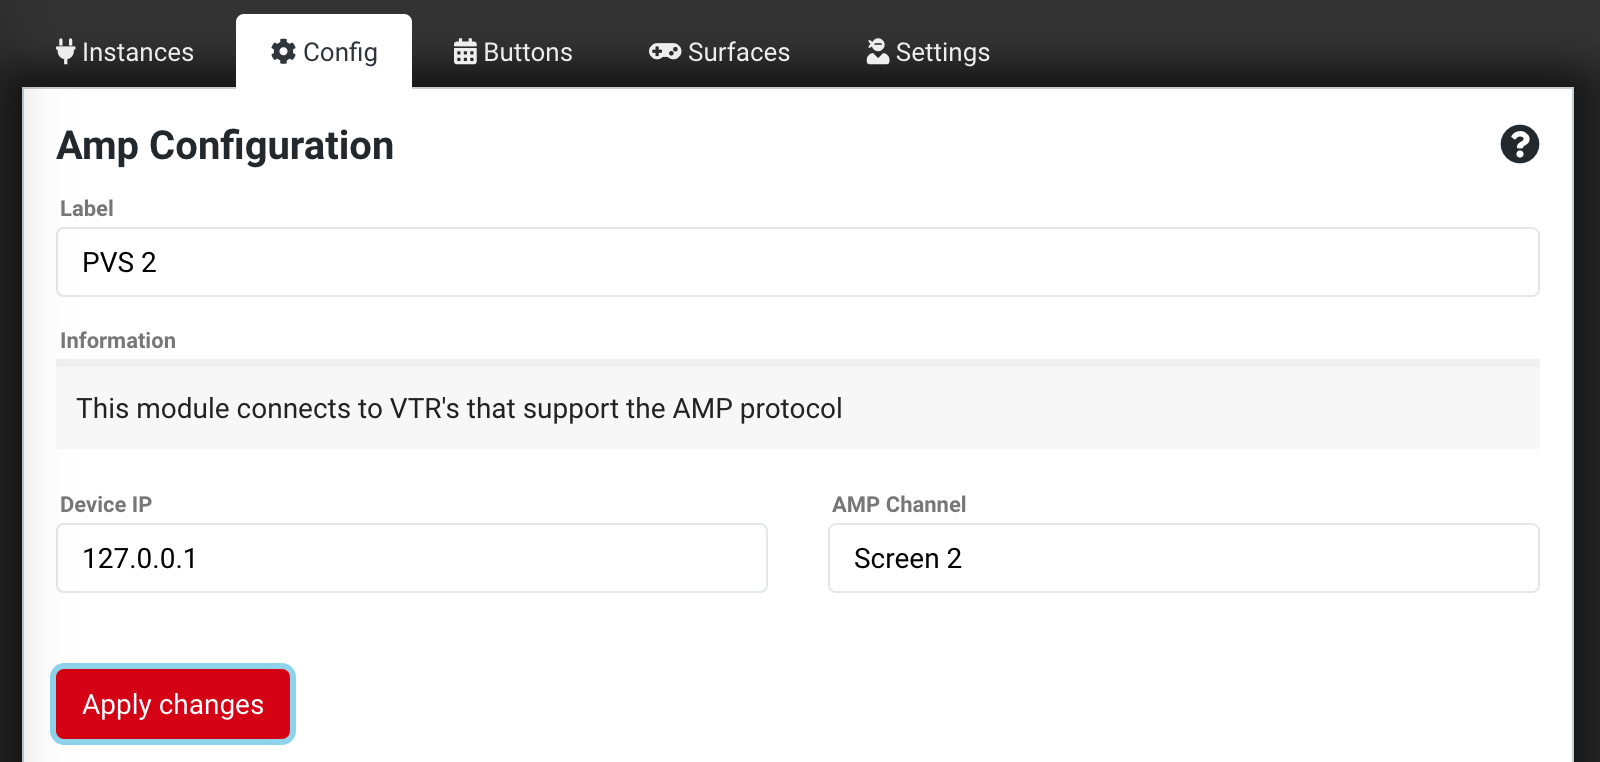
After you add your first AMP device you will be taken to the Config screen. You can change the Label to help you identify each AMP device later. You will need to enter the Device IP (from PVP) and change the AMP Channel name to match the PVS channel name. The default names in PVS are Channel 1, Channel 2, Channel 3, and Channel 4. In this example, the channel names have been changed to Screen 1 and Screen 2. Enter the correct name and then click the Apply button in Companion. Repeat for each channel you need to control.
At the bottom of the Config settings is the List of Dynamic Variables. AMP has the ability to report the transport state (Play, Pause, etc). However, we have found the implementation of this, at least in Companion, to not work consistently with PVS. If you want to try using it, you will need to copy the Variable and then paste it into a new Button as the name of that button. When it is working properly, it should update the button to show the current status of a channel.

As we mentioned above, adding an additional channel is the same process each time. Just change the Label and AMP Channel names so that you're able to distinguish each one later in the setup. The Device IP will be the same for each channel.
Note: If you are controlling PVS channels on more than one computer or you are not using Companion on the same computer as PVS, the IP address entered will be different. 127.0.0.1 is the local IP address for controlling devices on the same computer.
If you have successfully configured everything, you should see the status change to OK with a green background. Click on Buttons to start adding controls.

The AMP protocol has many more options than are actually supported by PVS. We currently support Play, Stop, and Load Clip. Fast forward, rewind, and record commands are not currently supported.
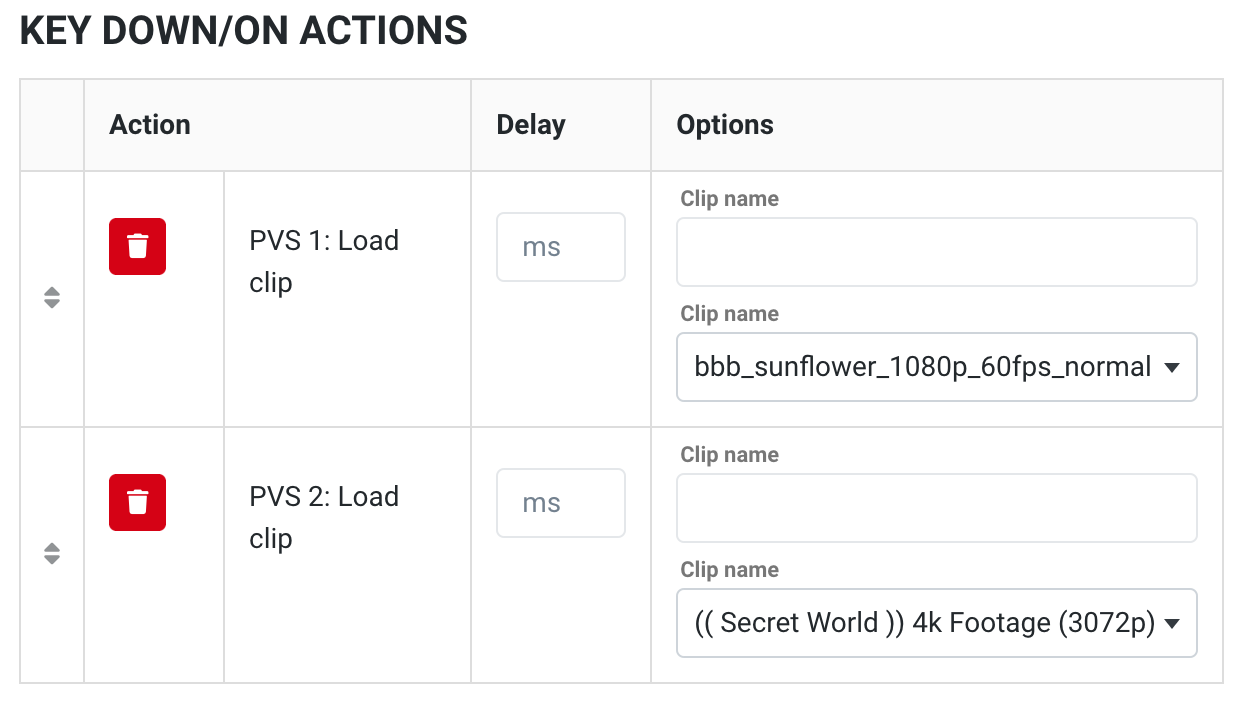
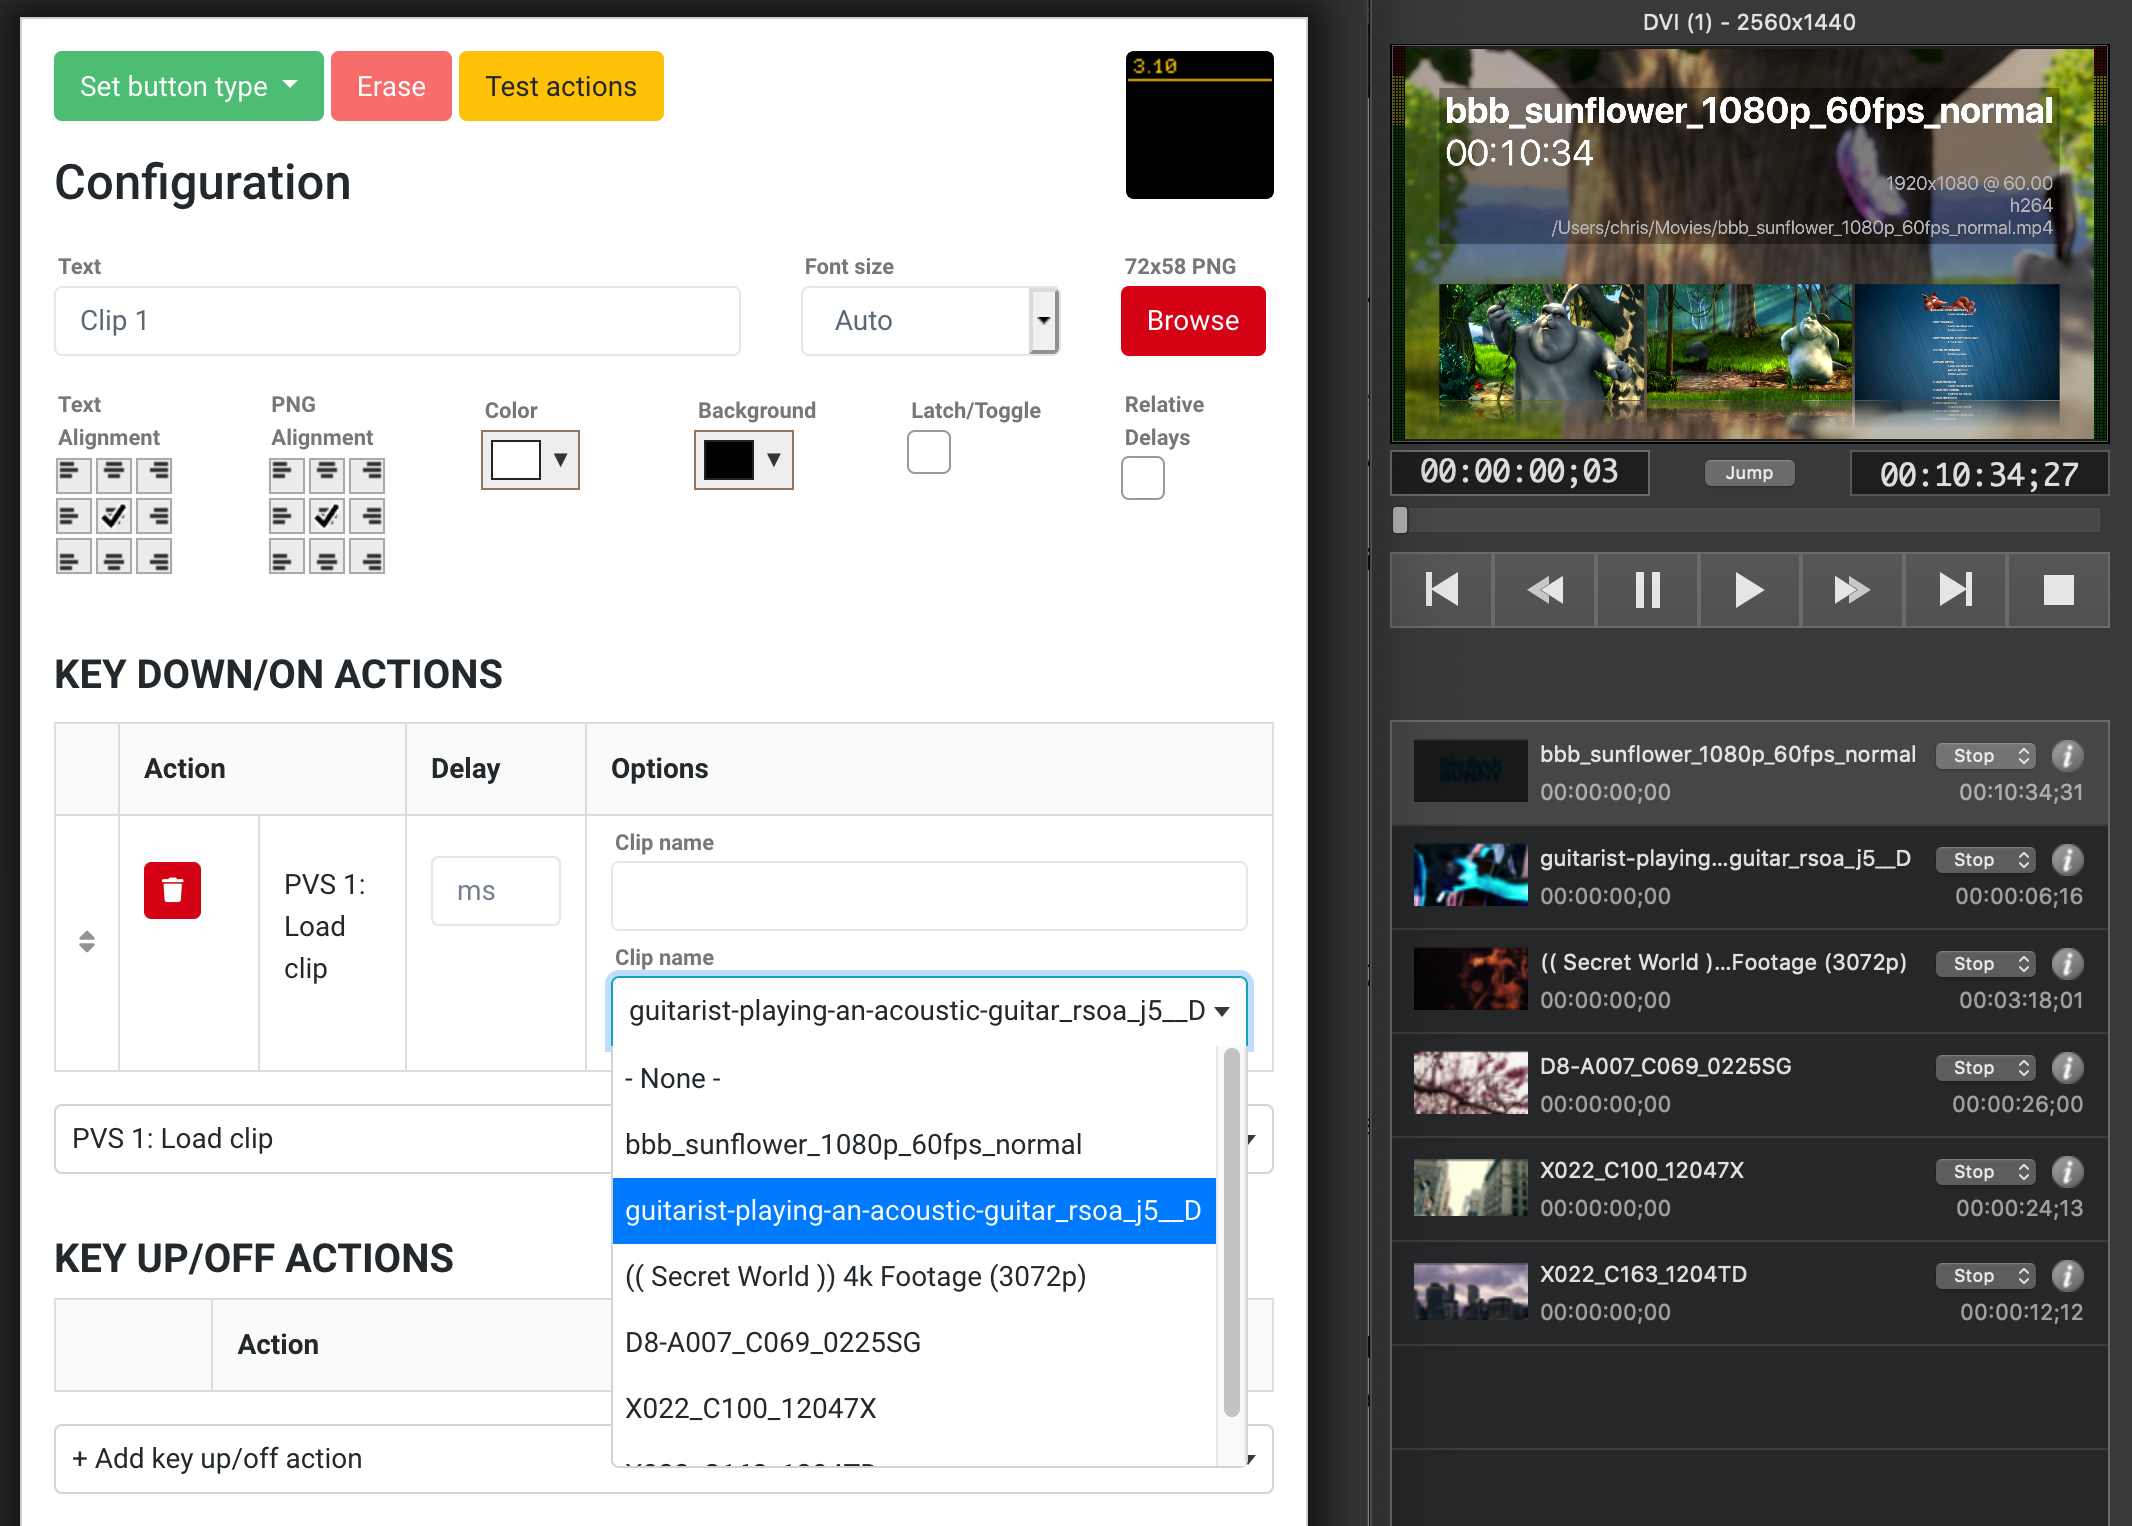
Load Clip is able to read all of the clip names in a PVS Playback channel and select a specific cue. This function can be a bit finicky, so if you know there are clips in your PVS channel that aren't showing up, you may need to delete the Load Clip action and restart PVS. You can also try disabling and re-enabling the instance within Companion.
When you add the Load clip action, you will see a text field and a dropdown list. Either option can be used. The dropdown list is the easiest way to select the file you want to play, but if you have added a file that isn't showing up in the list you can enter the name. The name must be entered exactly the same way you see it in PVS. Names are case sensitive, so Test Video is not the same as test video.
When you select this action and test it within Companion or on your Stream Deck, it will cue the video.
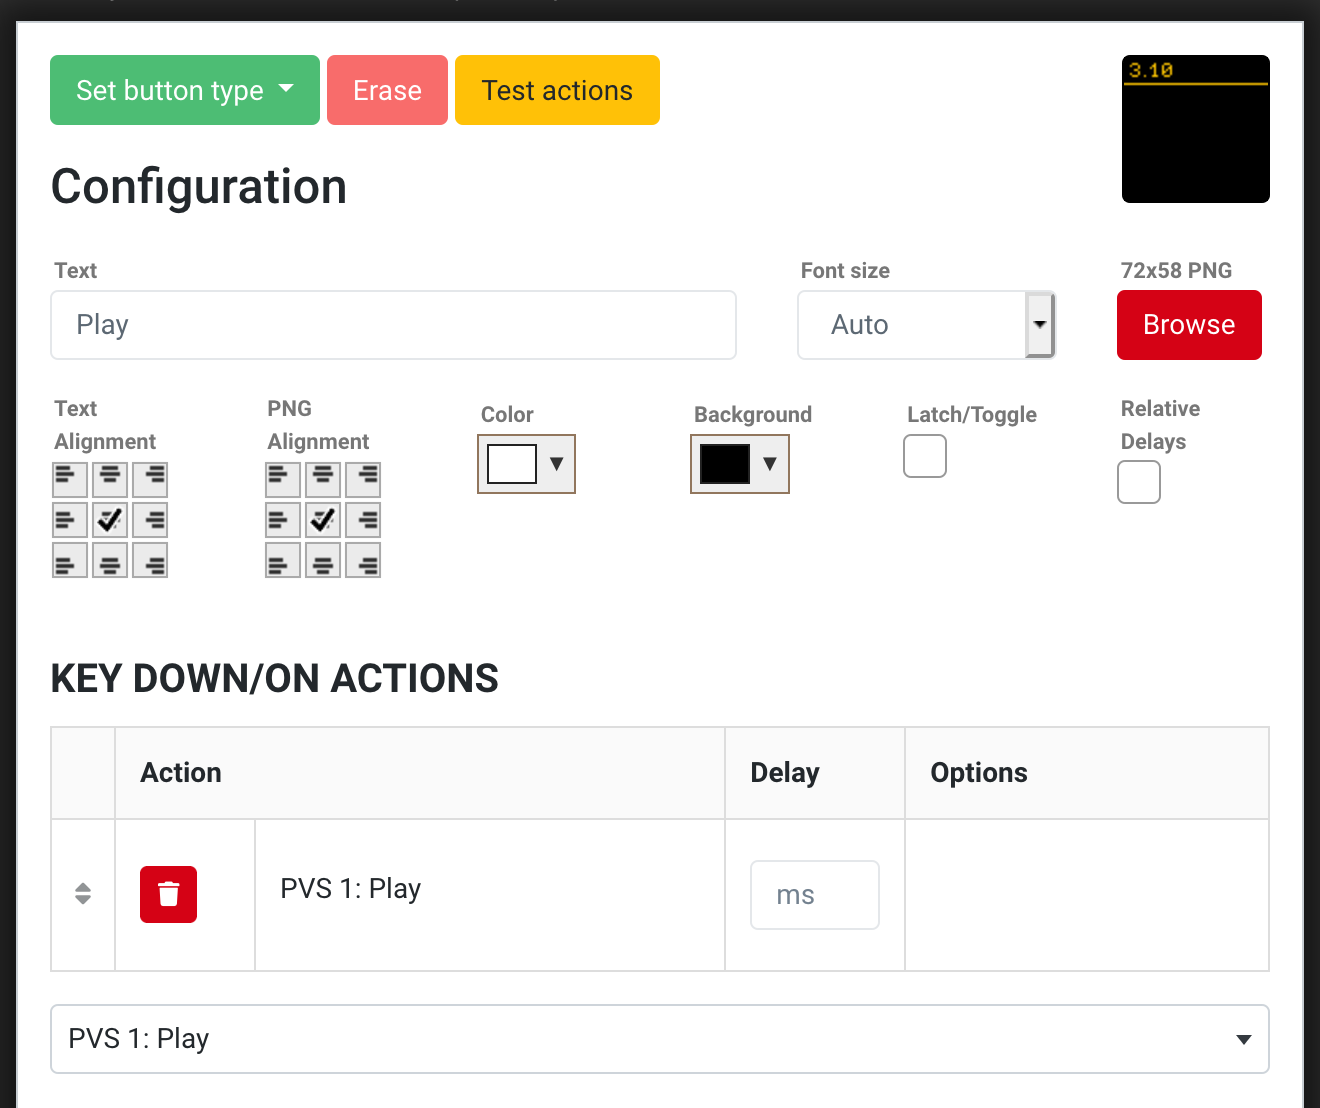
Add a Play action to another button in order to start a clip that has been cued.
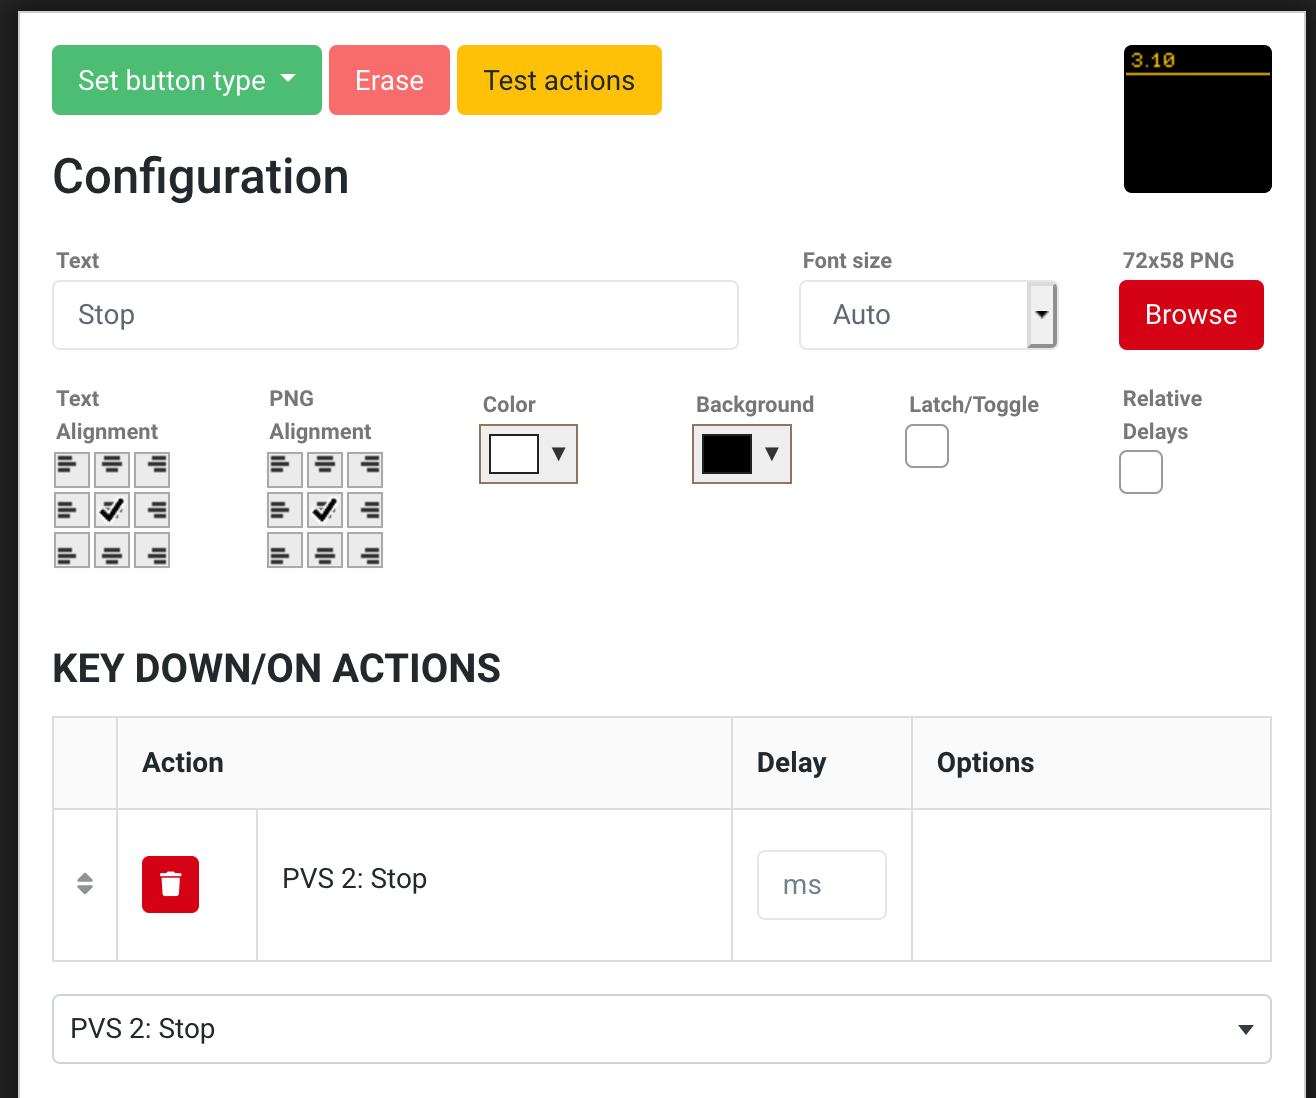
The Stop action will stop the currently playing video.
You can add multiple actions to a single Companion button, so if you are loading videos on multiple channels, just add an action for each channel and select the correct clip. Repeat this for Play and Stop so that all channels are controlled by a single button.