Edge blending consists of two or three overlapping projected images that have the overlapping regions adjusted to create a seamless blend. This can be accomplished digitally in ProPresenter by using our Edge Blending feature.
You will need to open your Display Preferences from the Apple () on your Menu bar and make sure your computer sees all connected displays and that you have the correct resolution for all connected devices.
The next step is to open ProPresenter and select Screens>Configure Screens in the menu bar
To create a Blended screen, click on the + next to Audience and select Edge Blend... This will create a new Audience screen in your configuration window. You can assign the Outputs in the Hardware tab as you do in normally assigning screens here.
To access the Edge Blending settings, click on the blended area in the middle of the configured screens.
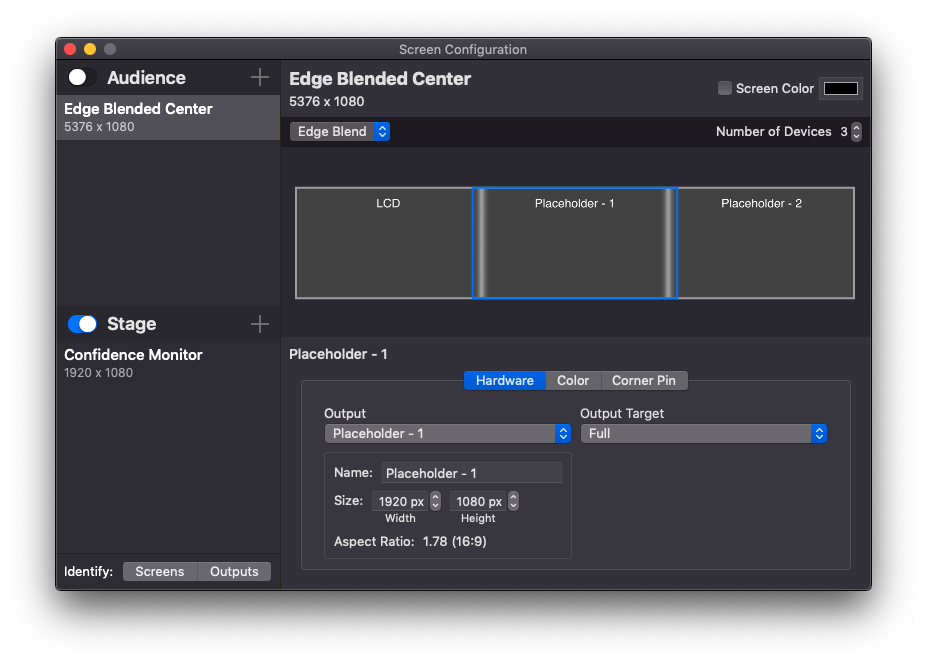
Once the Blend is highlighted, you'll see two tabs appear... Edge Blend and Color Adjustment.

You'll first want to set the Width of the Blend itself. Because the outputs of each projector have to overlap in order for blending to occur, the actual width of your output will be smaller than the output resolution. The Width of your blend will take a portion of the overlap from each screen.
The rest of the settings here are what you will use to set your Blend itself. There are three blend modes that change the way the blend is implemented.
Linear - this is a straight line blend
Cubic - this is more of a curved line blend
Quadratic - this is a significantly curved line blend
It's recommended to test each option to see what gives you the cleanest blend for your setup.
The two sliders below this allow you to adjust the Radius and Intensity values of the blend. You will need to spend some time working with these to get the best blend you can.
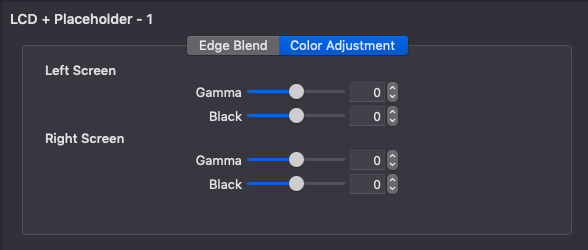
If you find that your blended areas are brighter than the rest of your screen, you will want to adjust those settings under the Color Adjustment tab. Black Level adjusts the video black brightness. Since a projector doesn’t display black, the brightness between the blended area and the rest of the screen may vary slightly.
Due to the wide range of projects and their quality, achieving a “perfect” edge blend is quite difficult, even for the most skilled person. Due to many factors, such as the quality of the projectors, the age of the lamps in the projectors, the number of hours each projector has been used, and even the brand of the lamps in the projector, you may still see a slightly visible area where the images overlap. This occurs with any edge blending solution.
Comments
0 comments
Article is closed for comments.