Using Clear Groups in ProPresenter
*note: this feature requires a minimum of ProPresenter7.7 (so an active ProPresenter+ as of 9/13/2021)
In the past, the clear options in ProPresenter were limited to just the built in options, clear all cleared all the layers or you could clear the individual layers. Now, however, you can specify different “Clear Groups” to clear whatever groups of layers you want to!
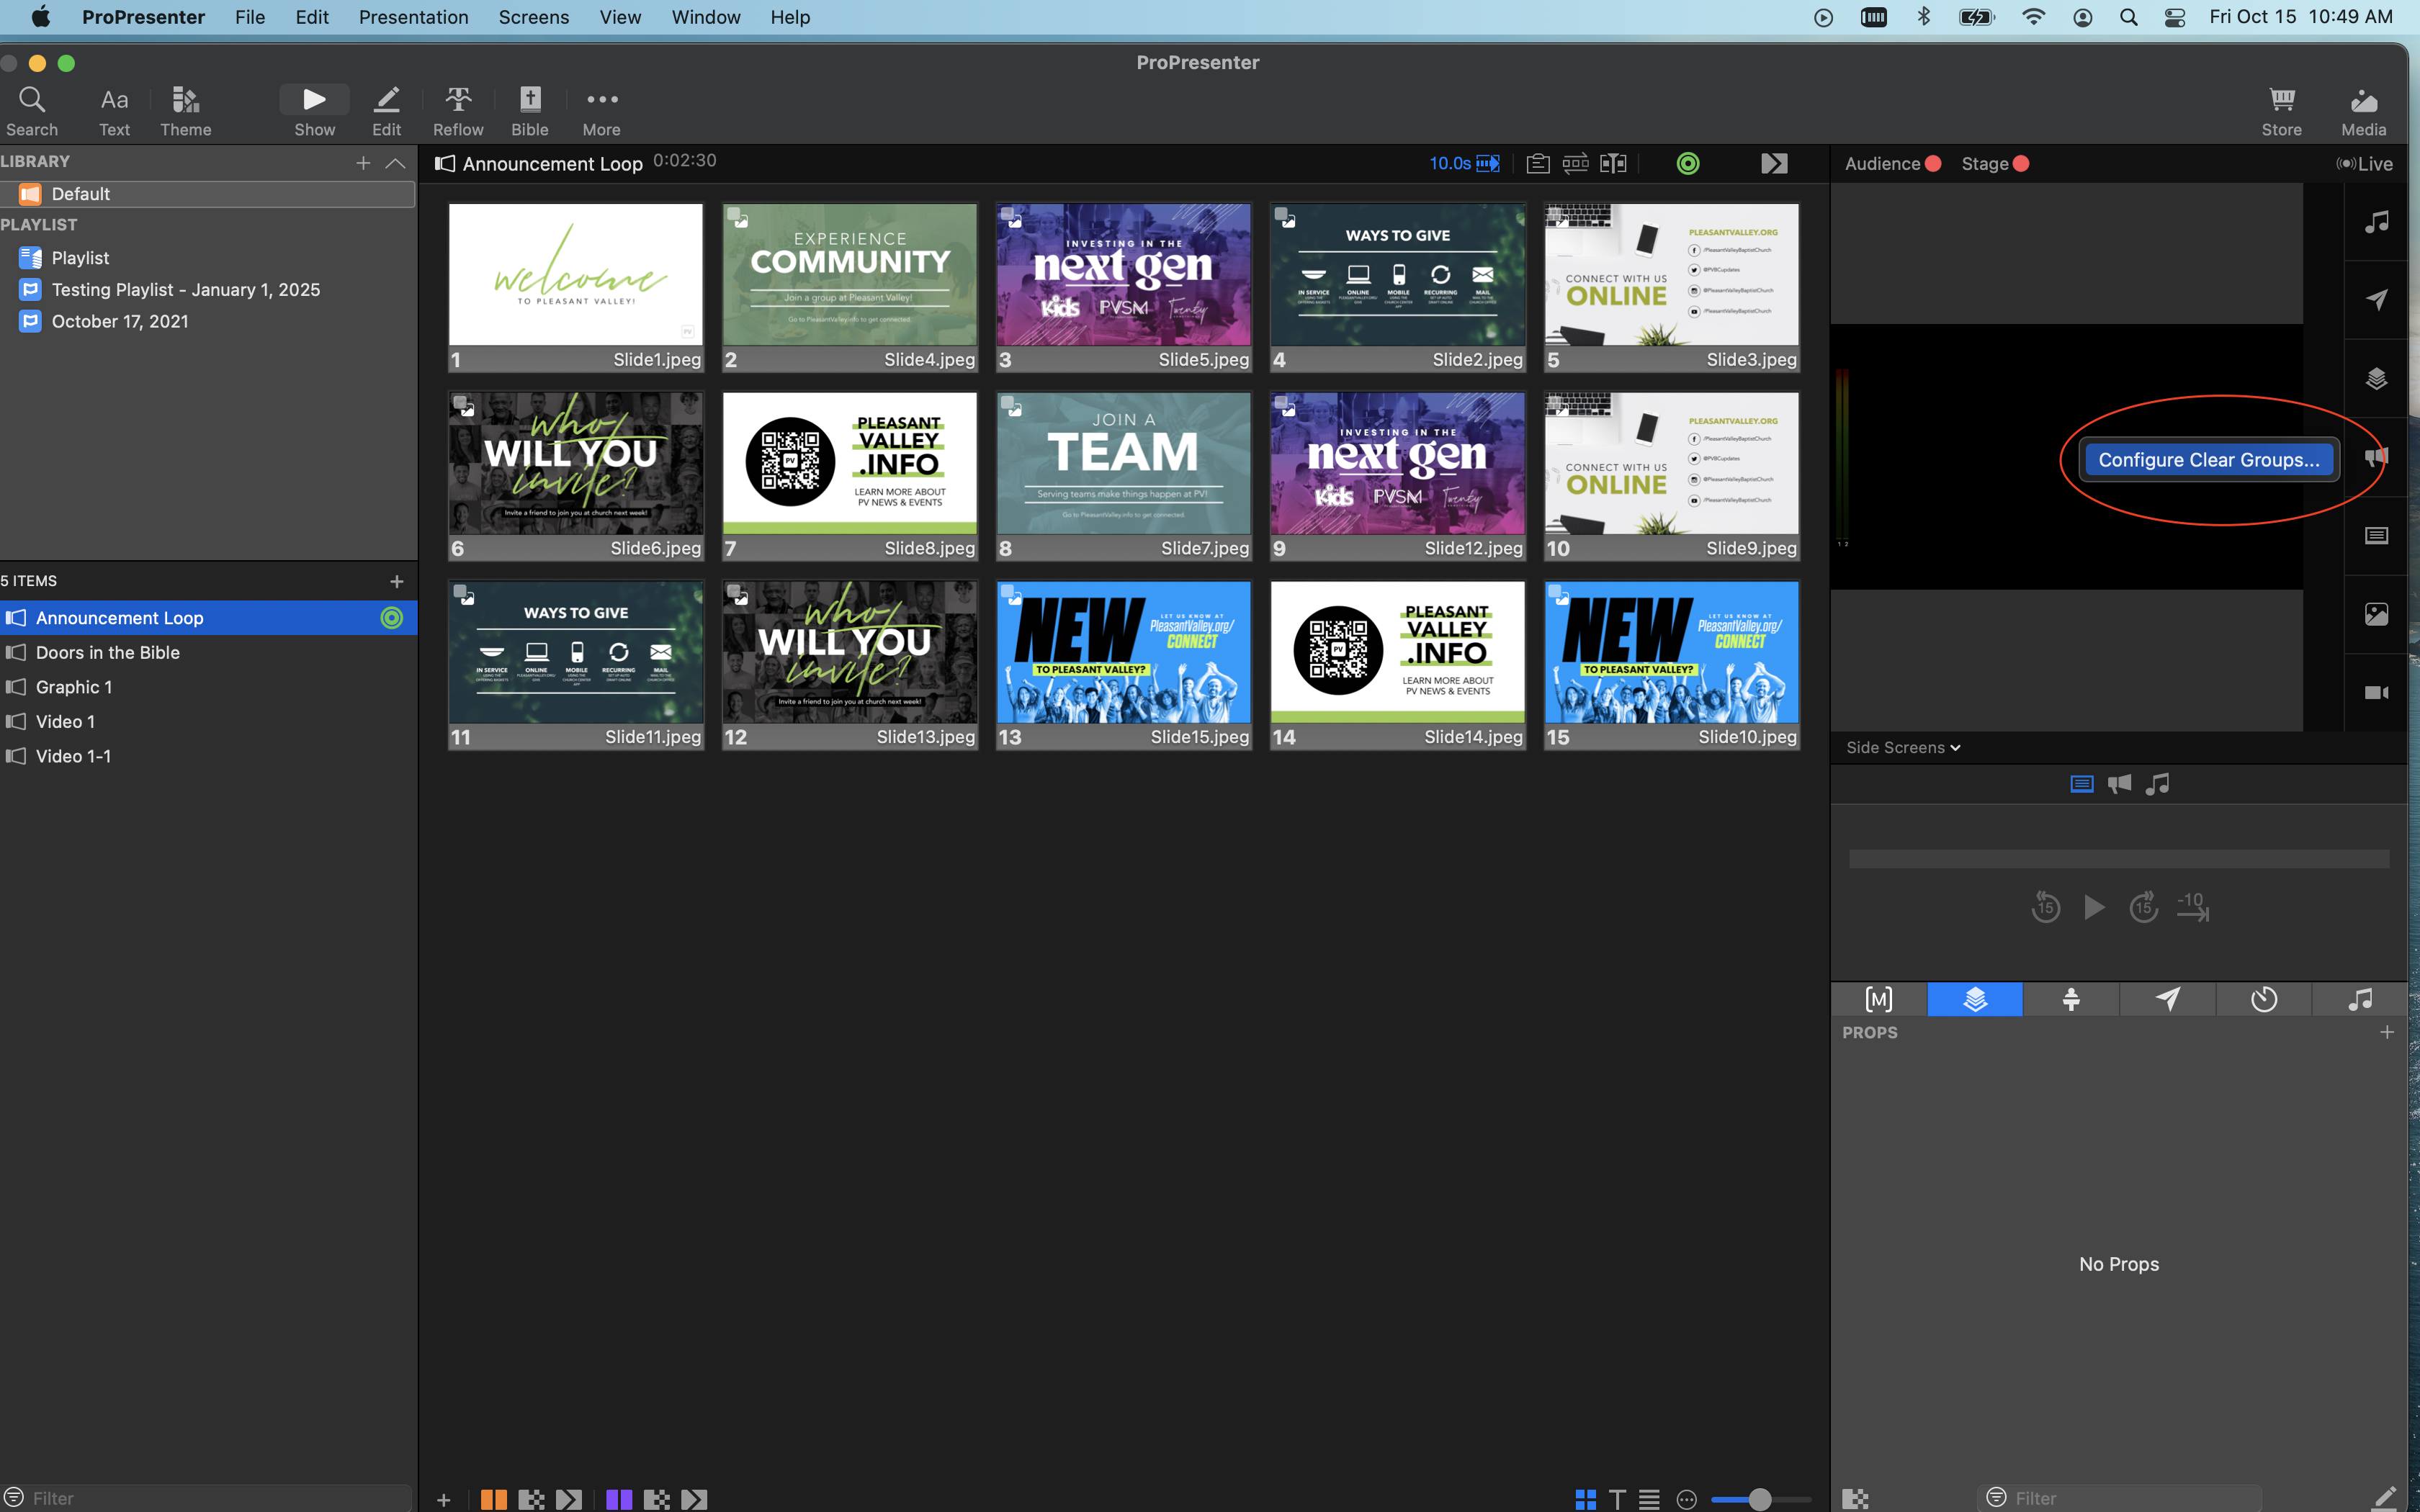
To access the window to configure these clear groups, right click on your clear actions and choose “Configure Clear Groups”
That will open the Configure Clear Groups window, which will look like this by default:
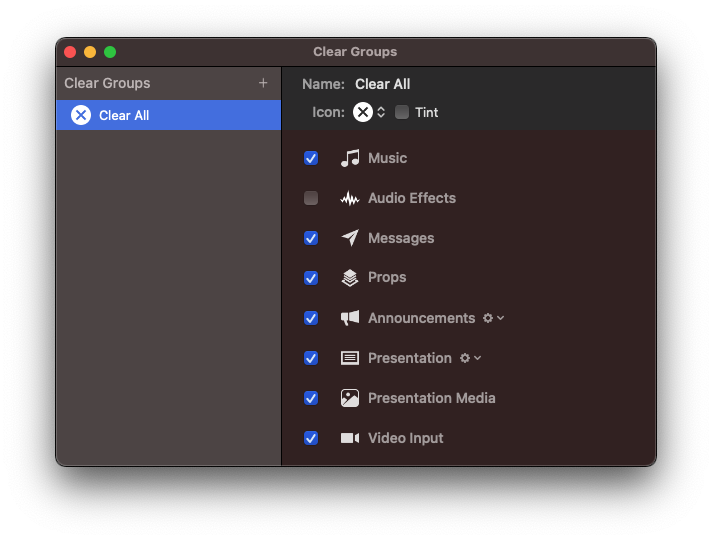
By default, you will have one clear group, Clear All. You can make changes to “Clear All”, but note that if you do, you will no longer have a clear group that truly clears everything unless you create a new one.
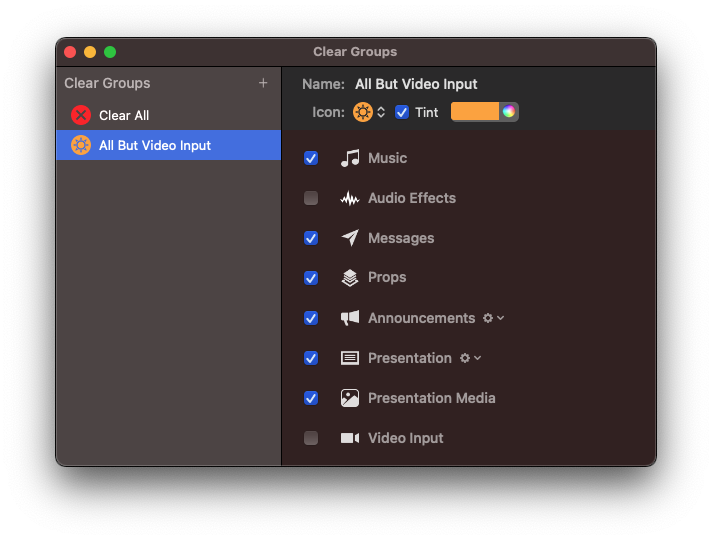
To add a new clear group, click the + in the top left of the window. When you click this, a new clear group will appear and you can type in the name you would like. For the purposes of this article, I’ve created one named “All But Video Input” in which my clear group will clear everything but the Video Input.
You’ll notice several options in this window that I’ll go over below:
Attributes of the Clear Group
Name: You can change the name of the clear group by clicking in this box and typing the new name
Icon: You can open this dropdown to choose a pre-loaded icon or load your own!
Tint: If you check this box, your icon can have the color tint of your choice. (in my example I gave my Clear All red and All But Video Input Orange to help the operator to distinguish between them.
Elements of the Clear Group
Music: This clears anything set to “Audio Track Type” in the Audio bin or other audio files that may be playing.
Audio Effects: This clears anything set to “Sound Effect Type” in the Audio bin
Messages: This clears the Messages Layer
Props: This clears the Props Layer
Announcements: This clears any presentation assigned to the “Announcement” Layer. The settings gear next to it allows you to choose whether you want to stop any timeline you may have set up on the presentation(s) going to the announcement layer
Presentation: This clears all slide elements on the presentation layer. The settings gear next to itallows you to choose whether you want to stop any timeline you may have set up on the presentation(s) going to the presentation layer (note: this also includes media added to the slide as a slide element in editor)
Presentation Media: This clears all media elements added to presentations in the presentation layer. (note: this does NOT include media added as a slide element in editor)
Video Input: This clears any active video inputs.
You will just check/uncheck the elements that you want included/not included in your clear group!
To delete a clear group, right click on the name on the left-hand side-delete
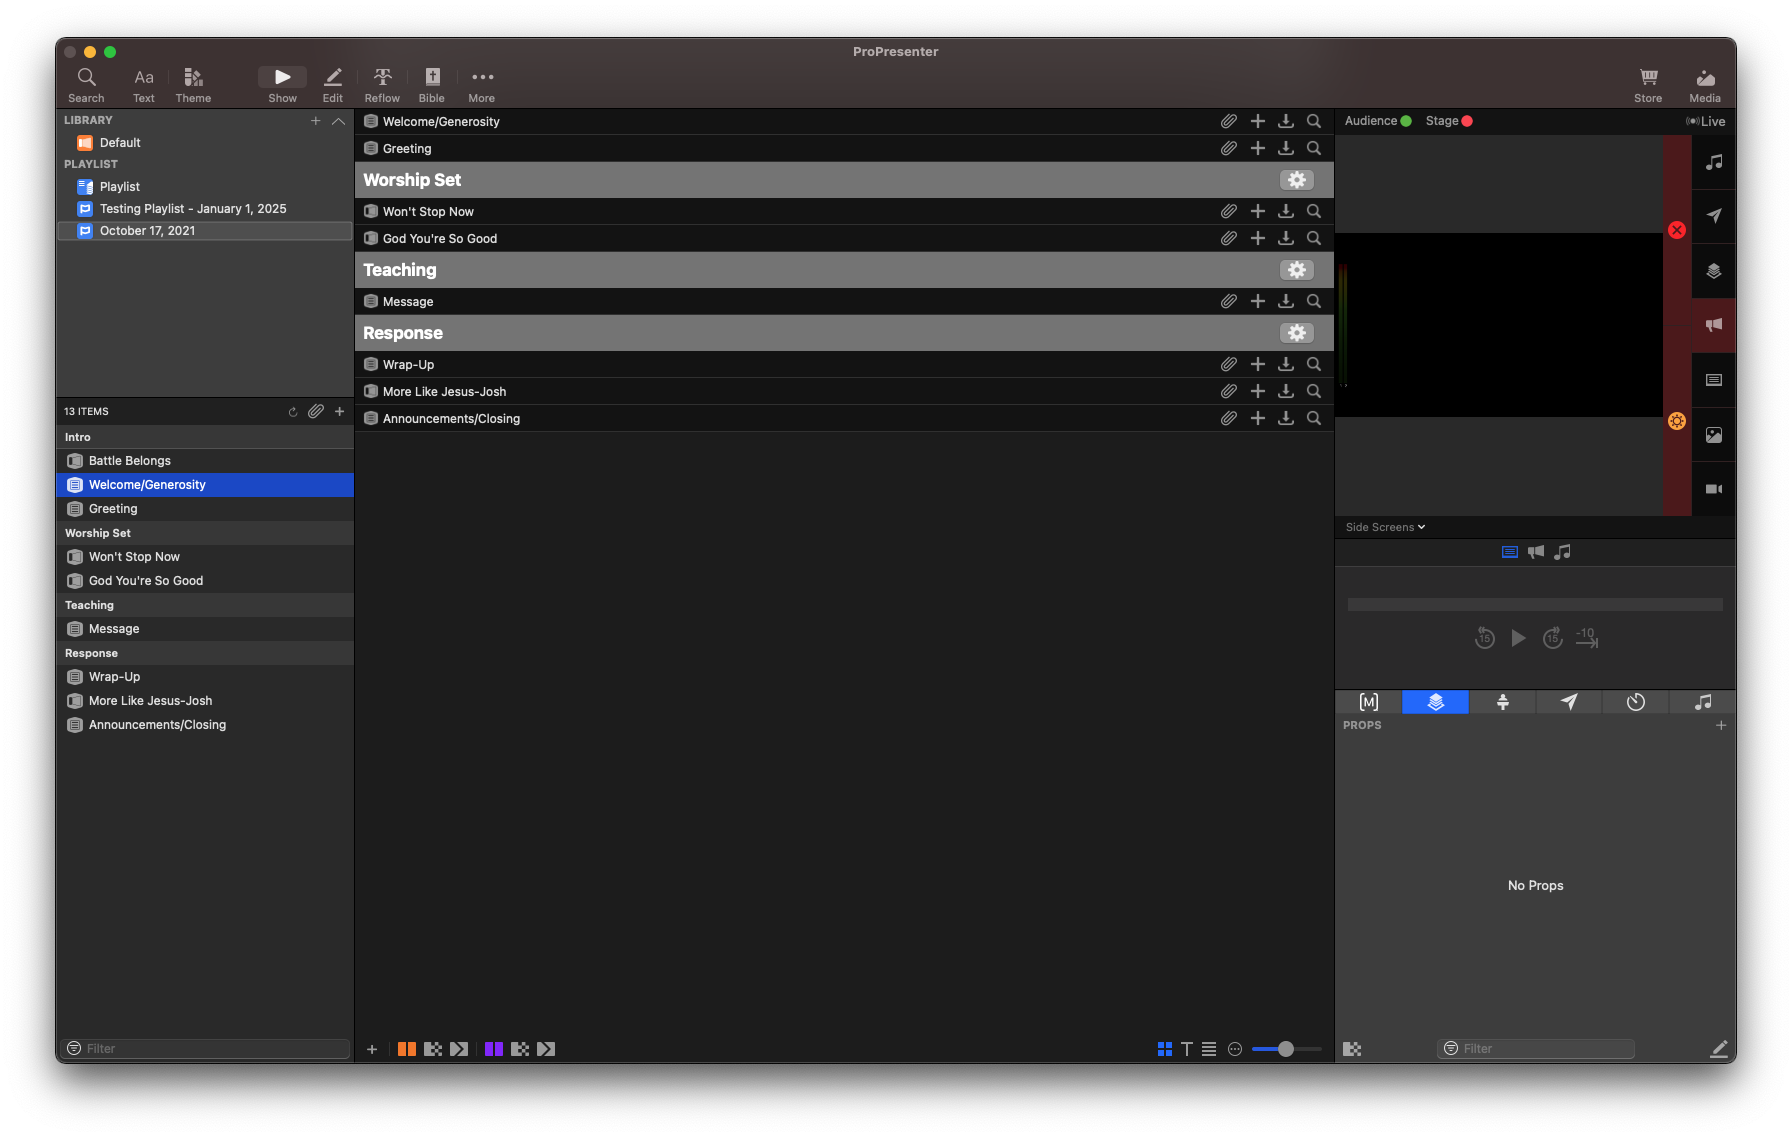
When you add a clear group, the new icon/tint will appear in the clear actions portion of the preview window like this:
Comments
0 comments
Article is closed for comments.